Frequently Asked Questions
Login and Authentication
Are ID.me and Login.gov interchangeable login options for my NBDC Datasharing account if I use the same e-mail address?
If you use a different identity provider (ID.me and Login.gov), the system will treat you as a new user because each provider shares different information with Lasso login service. As a result, you might be redirected to the new account registration form. To avoid this issue, please continue using the same identity provider you originally used to create your account.
Do I have to remember whether I initially registered my Lasso Profile with login.gov or ID.me?
Yes. Please keep track of which login provider (login.gov or ID.me) you used when you originally registered your Lasso account. Each login provider shares different information with Lasso. If you first login using login.gov and then later use ID.me (or vice versa) - even with the same e-mail - the system will not recognize you.
What happens if I change the email address I use with ID.me or Login.gov? Will my NBDC Datasharing account still work?
Your NBDC Datasharing account on Lasso is tied to the email address and identity provider (e.g. ID.me or Login.gov) you used when you first signed up.If you change the email address in your ID.me or Login.gov account and then log into Lasso using that new email, the system will treat you as a new user, and:
- You’ll be redirected to the registration page, and
- You will not see any of your previous data or access, because it is linked to your original email.
If there's a compelling reason to change your login email, please consult your identity provider’s help resources:
Globus Setup
I'm not sure how to set up the Globus Connect app. What should I do?
No worries — setting up Globus Connect is straightforward, and we’ve got you covered with step-by-step instructions.
You can:
- Read the setup guide directly in the Download Tools module found in the left-hand menu of your Lasso screen or
- Access the full documentation here for a complete walkthrough on how to install the app, initiate downloads, and monitor transfer progress.
If you run into issues, feel free to submit a help ticket via the Help Center module found in the left-hand menu of your Lasso screen.
Can I link more than one Globus account to my RAS login?
No — you can only use one Globus account with your RAS login.
When you first log in using RAS and link a Globus account, the system stores the Globus Universally Unique Identifier (UUID) from that account. This UUID is what determines your access rights.
If you try to use a different Globus account, the UUID will not match, and your access will fail due to an ACL (Access Control List) mismatch.
Important:
- Always log in with the same Globus account you originally linked to RAS.
- Switching to a different Globus account is not supported and will result in permission errors.
I accidentally selected the High Assurance (HA) option when setting up Globus Connect Personal. Can I undo this or reset my configuration?
Yes. To fix this:
- Open the application and go to Preferences.
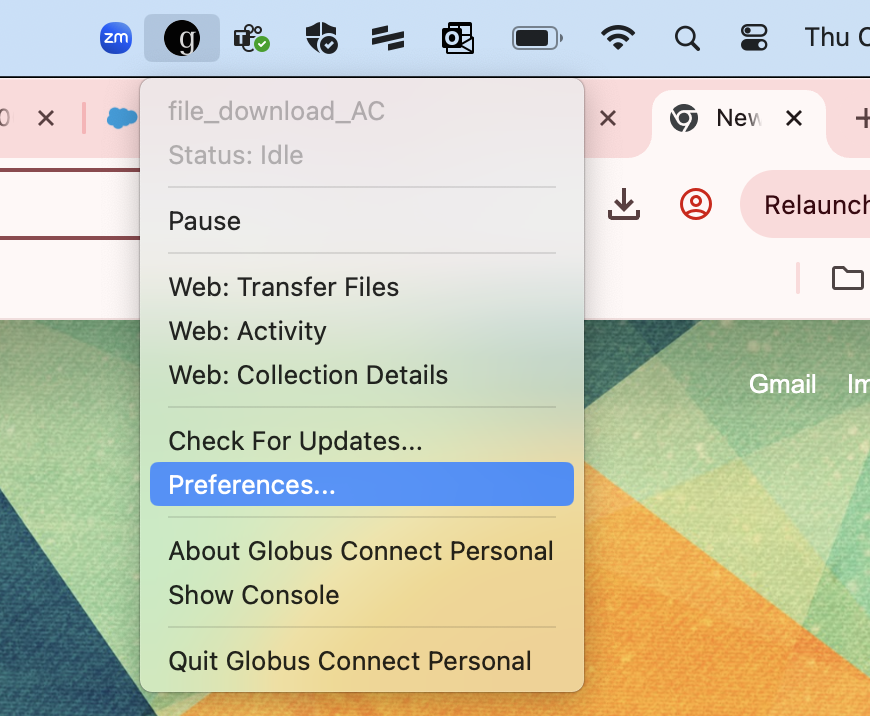
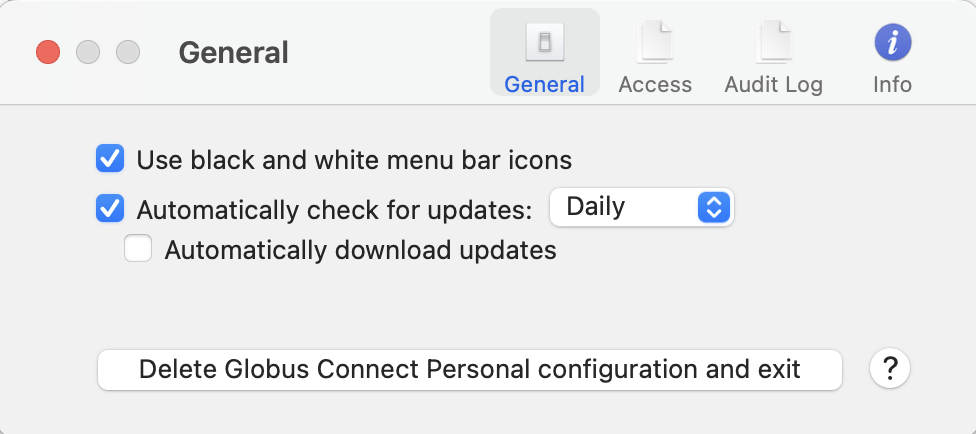
- Delete the Globus Connect Personal configuration and exit the app.
- Reinstall Globus Connect Personal.
- This time, do not select the High Assurance (HA) option during setup.
When transferring data, I received the error “Error triggering transfer – Deadline must not be more than 30 days.” What should I do?
This error occurs when a transfer takes longer than 30 days to complete.Unfortunately, this is a Globus limitation and the deadline cannot be extended.Smaller files will not trigger this error, but very large datasets may.
To resolve:
- Restart the transfer to the same destination path as the original.
- Globus will only attempt to download the files that did not transfer in the previous run.
I am trying to log in through Globus with my institutional credentials, but I get an error. What should I do?
This error comes from your university’s login system, not the DataSharePlatform. Here are some steps to resolve this issue:
Clear your cache only for the Globus site:
- Go to the Globus Personal Connect download page.
- Click the site settings button (small icon next to the URL).
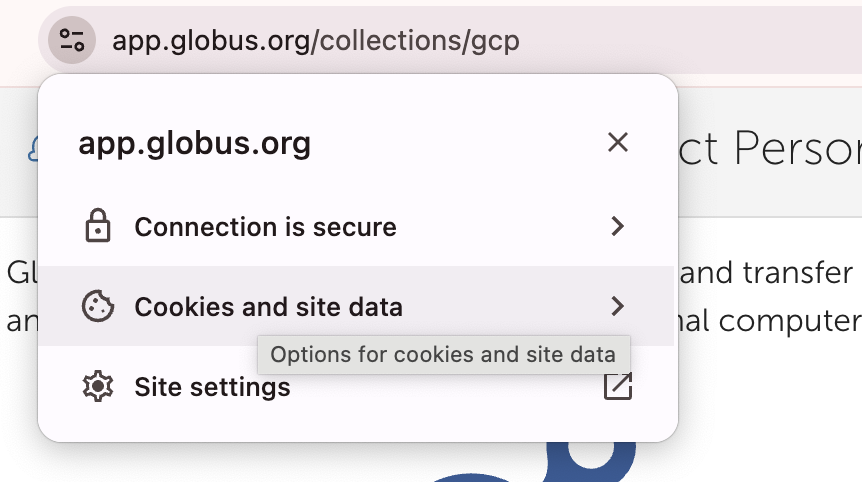
- Select Cookies and site data.
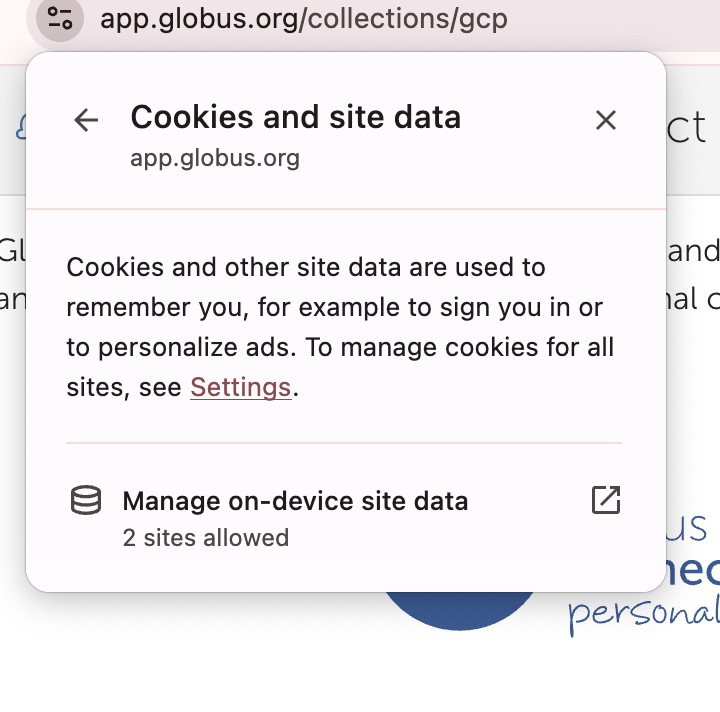
- Choose Manage on-device site data and delete any saved data for Datashare.
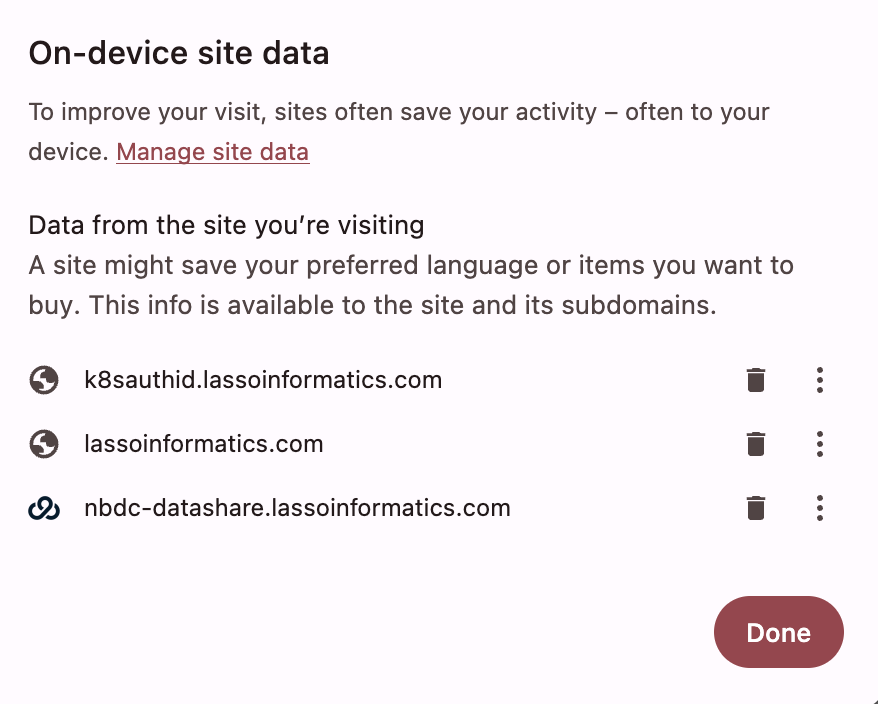
- Reload the page and try logging in again with your institutional credentials.
If this does not work, please contact your university’s IT team and they will be able to help resolve this directly. If they also run into problems, you’ll need to open a support ticket with Globus for further assistance.
Data Querying and Access
Can I query data while waiting for my DUC to be approved?
Yes — you can explore the data at a summary level while your DUC is still pending approval.
Once your DUC is signed off by your Institutional Signing Official and approved by the Data Access Committee at the National Institutes of Health (NIH), you’ll receive an email prompting you to complete a Responsible Data Use training module and pass the associated quiz. Once you complete these steps, you will have full access to download participant-level data.
Until then, you can:
- View high-level metadata about the available datasets
- See how many and which sessions (visits/timepoints), research domains, and instruments are part of the ABCD and HBCD studies
- Explore participant counts associated with various instruments (and combinations of instruments)
- Browse the data dictionary and create codebooks using the Dictionary Query Tool
- If you plan to use file-based (imaging files) data, prepare by installing Globus via the “Download Tools” module in Lasso (see FAQs 4 and 5 below)
However, you will not be able to download any data until all access requirements are met.
To learn more about what you can do while you wait for DUC approval, please refer to the detailed documentation available here.
I want to download large datasets, specifically imaging files. How do I do that?
For large datasets — particularly imaging files — we recommend using Globus for secure and efficient data transfer.
Globus is designed for handling large-scale downloads and offers a more reliable and faster alternative to browser-based downloads.
For step-by-step instructions on how to use Globus with the Lasso platform, please refer to the detailed guide available here.
What format will my data downloads be in?
Tabular (i.e. survey) data will be downloaded to your computer as a CSV file.
File-based (i.e. imaging) data can come in several formats, including NIfTI (nii.gz), json, tsv, bval, bvec, fdt, set, txt, or more in BIDS-compliant formatting.
You can see the file-based data file types by navigating to the Query Data module found in the left-hand menu of the Lasso screen and toggling to File Based Data in the top-right corner. File types for each imaging modality or variable are written in blue.
Will I be able to download previous datasets?
Not yet — but this functionality is coming soon.
We’re actively working on enabling access to previous dataset versions and will notify users once this feature becomes available.
Stay tuned for updates!
General
How do I report an issue or get help?
To report an issue or ask a question about the study data or Lasso platform:
- Click on the Help Center module on the left-hand menu of the Lasso platform.
- Select Create An Issue.
- Fill out the form with as many details as possible — this helps us route your request to the right team and respond efficiently.
For step-by-step guidance, please refer to the full instructions here.
You’ll receive an email confirmation after submitting your ticket, and you’ll be notified by email when there’s an update.
Why am I seeing an “Oops, something went wrong” error when accessing the Datashare platform?
This error can occasionally occur due to outdated or corrupted browser cache or site data. To resolve the issue, please clear your browser’s cookies and cached data . After doing so, refresh the page and attempt to log in again.Alternatively, you may access the platform using a private/incognito browsing window, which bypasses previously stored site data and often resolves caching-related errors.
Visit the study FAQs
